


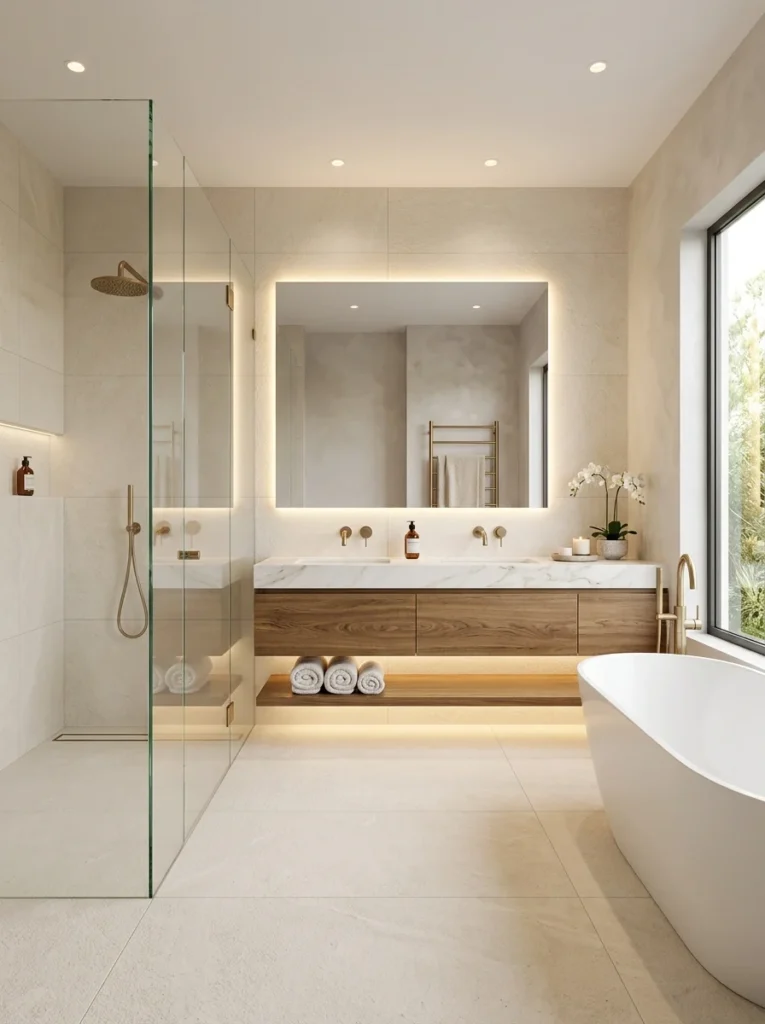
Bathroom tile mistakes happen before a single tile is laid — in the showroom, in the sample selection, in the grout choice. Here’s what the industry rarely tells you upfront.Tile contractors see the same mistakes made by different homeowners so consistently that most of them have a quiet internal list of decisions they know will produce a regret call six months after installation. The list isn’t about taste. It’s not about choosing the wrong color or the wrong size. It’s about the things nobody explains before the tile goes down — the variables that exist between the showroom sample and the finished bathroom that the industry has little incentive to discuss while you’re still in the buying phase.
This article is that list. Not every piece of it is dramatic, but every piece of it is the kind of thing that experienced tilers, designers, and homeowners who’ve been through the process once wish they’d known before the first decision was made.
The Scale Problem Nobody Warns You About
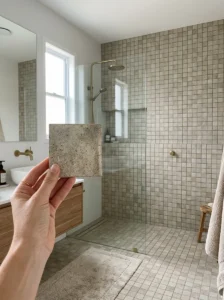
A tile sample in a showroom is typically four to six inches square, held in the hand under showroom lighting, evaluated against other samples on a display board. This is almost the worst possible context in which to make a decision that will cover thirty, fifty, or a hundred square feet of bathroom floor or wall.
Scale changes everything about how a tile reads. A tile that looks bold and graphic as a sample reads completely differently when repeated across a full floor — sometimes more subtle, sometimes overwhelmingly busy, almost always different from the sample in ways that catch people by surprise. The grout lines, which are invisible in a sample, become a visible network across the whole installation. The pattern repeat, which can’t be seen in a single tile, reveals itself at scale in ways that are either beautiful or nauseating depending on the tile and the layout.
What to Do Instead
Request the largest sample available for any tile you’re seriously considering. If the showroom doesn’t have a full sheet or a larger display panel, ask if they can direct you to an installation or if they have installation photos at scale. Some tile retailers will allow sample loans — a few loose tiles taken home to lay on the actual floor or hold against the actual wall in the actual bathroom light.
That last part matters: the actual bathroom light. A tile that reads warm and creamy under a showroom’s controlled lighting can read cold and gray under the fluorescent or LED light in your specific bathroom. Evaluate tile samples in the space they’ll live in, not in a showroom.
Grout Is Not a Secondary Decision — It Is Half the Decision
This is the single most consistently underestimated variable in any tile project, and the one most likely to change how the finished bathroom reads relative to expectations.
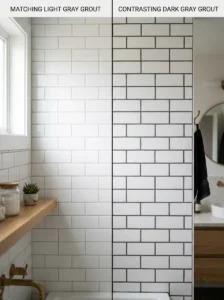
Grout lines are not neutral. In a standard tile installation, the grout lines together occupy a significant portion of the visible surface — sometimes as much as fifteen to twenty percent of the total area depending on tile size and joint width. This means the grout color, tone, and finish contributes nearly as much to the finished look as the tile itself.
Matching grout — grout chosen to closely match the tile color — minimizes the visibility of individual tiles and makes the tiled surface read as one continuous field. This creates a cleaner, more seamless effect and makes the space feel larger because the eye isn’t interrupted by a grid.
Contrasting grout — grout in a notably different tone from the tile — emphasizes the grid pattern and makes each individual tile read distinctly. This creates a more graphic, structured effect. It also reveals every tile that isn’t perfectly aligned and every line that isn’t perfectly straight — the installation quality becomes more visible with contrasting grout than it would be with matching grout.
White grout specifically deserves a separate note. White grout looks exceptional at installation. In a bathroom — a room with regular humidity, soap, and body oils — it begins to discolor faster than most people expect, particularly in the shower and around the floor near the toilet and sink. Light gray grout in the same space will show a fraction of the same staining and requires significantly less maintenance to look clean. Many tile professionals will quietly recommend against pure white grout in high-use bathroom areas for exactly this reason.
Slip Ratings: The Safety Variable That Showrooms Rarely Lead With
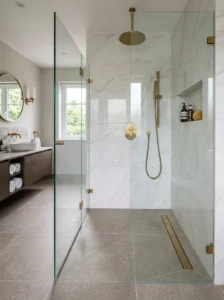
Every tile has a slip rating, and bathroom tile — particularly shower floor and wet-area floor tile — has a specific requirement that decorative appeal should never override.
The relevant rating for wet barefoot areas is the coefficient of friction (COF), often measured as a Wet DCOF (Dynamic Coefficient of Friction) rating. For floors that will be walked on wet and barefoot, a minimum DCOF of 0.42 is the generally accepted standard, with higher being safer.
Polished marble and very smooth porcelain — both frequently used in bathrooms because they look luxurious — often have low wet COF ratings. On a shower floor or a bathroom floor regularly wet with shower water or bath splashes, these beautiful surfaces can become genuinely dangerous, particularly for older household members.
The tile that looks most beautiful is not always the tile appropriate for the floor. The design solution for this tension is to use the beautiful low-COF tile on walls, where it’s not walked on, and a different tile with appropriate slip resistance on the floor. This is a standard approach in well-designed bathrooms and allows visual ambition and safety to coexist.
Always check the DCOF or slip rating of any tile before specifying it for a wet floor area. Reputable tile retailers can provide this specification on request, and if they can’t, that’s a signal to purchase from a supplier who can.
Porosity and What It Means for Your Specific Maintenance Reality
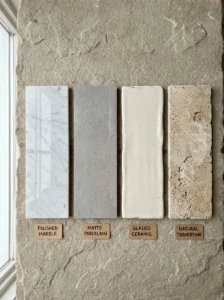
Tiles vary significantly in their porosity — how much liquid they absorb — and porosity determines how much maintenance a tile will require in a bathroom setting.
Natural stone tiles (marble, limestone, travertine, slate) are porous to varying degrees. In a bathroom, unsealed natural stone will absorb moisture, soap, body oils, and cleaning product residue, leading to staining, darkening over time, and in humid environments, mold growth within the tile material itself. Natural stone in a bathroom requires sealing at installation and resealing at regular intervals — typically annually in a shower, every few years on a dry floor area.
Ceramic and standard porcelain tiles are considerably less porous than natural stone, and for most practical purposes don’t require sealing. They’re the lower-maintenance choice for bathroom applications.
Glazed tile — tile with a fired glaze over the surface — has the glaze as a non-porous layer. The body of the tile beneath the glaze may still be porous, which becomes relevant at grout lines and cut edges, but the tile face itself is sealed by the glaze.
The maintenance question worth asking before committing to any tile is honest and direct: given how this bathroom is actually used, how often will I realistically perform the maintenance this tile requires? Natural stone in a frequently used main bathroom shower is a genuinely demanding maintenance commitment. Natural stone in a guest bath used infrequently is considerably less so.
The Installation Is More Important Than the Tile
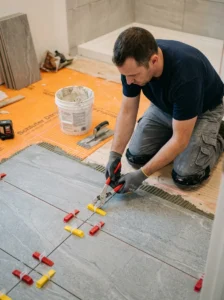
This is the tile industry truth that matters most and gets discussed least: the quality of the installation determines the result more than the quality of the tile itself.
A beautiful, expensive tile installed by a careless or inexperienced tiler — with inconsistent spacing, tiles not properly bedded in adhesive, grout lines of varying width, corners not cut cleanly — looks worse than a modest tile installed by a skilled tradesperson with attention to alignment, consistent joints, and clean cuts at every edge.
The specific installation details that most affect how a finished tile job reads:
Consistent joint width — grout lines of uniform width across the entire installation read as professional. Varying joint widths, even by a millimeter or two, read as careless once you notice them.
Flat tile surface — tiles should be level with each other across the installation. Lippage — where one tile edge is higher than the adjacent tile — catches light at an angle and makes the surface look uneven. Good installation practice checks for and corrects lippage before adhesive sets.
Clean cuts at edges, around fixtures, and in corners — the perimeter of any tile installation and the cuts around toilets, vanities, and pipes reveal the skill of the installer. A clean, precise cut reads as craftsmanship. A rough, uneven cut, even when hidden under a cover plate or caulk line, often shows.
Proper waterproofing in wet areas — behind the tile in a shower or wet room, there must be proper waterproofing. Tile adhesive and grout alone are not waterproof. Water penetrates grout over time and reaches the substrate. Without proper membrane or waterproofing treatment behind the tile, water infiltrates the wall structure and causes damage that isn’t visible until it’s significant. A contractor who doesn’t discuss waterproofing in a shower tiling project is a contractor to approach with caution.
Rectified vs Non-Rectified Tile: A Specification That Changes the Result
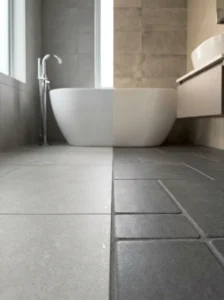
This is a term that comes up in tile specifications and is often passed over without understanding what it means practically.
Non-rectified tile comes out of the kiln with slight variations in dimension — tiles in the same batch may vary by a millimeter or two in size. This is inherent in the firing process. These tiles require wider grout joints (typically 3mm or more) to accommodate the variation and keep lines visually consistent.
Rectified tile is mechanically cut to precise dimensions after firing, producing tiles that are uniform in size to a much tighter tolerance. Rectified tile can be installed with much thinner grout joints — sometimes as small as 1-2mm — which produces the clean, seamless look seen in contemporary bathroom photography.
The visual difference between a standard tile with 3mm joints and a rectified tile with 1.5mm joints is significant. The seamless, almost grout-line-free look that appears in design inspiration photos is almost always achieved with rectified tile and thin joints. If that look is the goal, understanding whether the tile being considered is rectified is a necessary part of the specification.
Pattern Layout and What It Does to Room Perception
The direction and pattern in which tile is laid affects how a room’s dimensions read — a fact that’s well known to experienced designers and almost unknown to homeowners choosing tile for the first time.
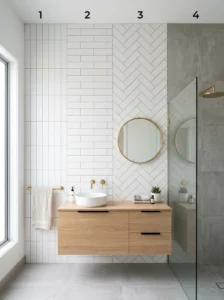
Horizontal brick pattern (standard offset/staggered layout) emphasizes the horizontal line. In a bathroom, this can read as grounding and traditional, but in a low-ceilinged bathroom it can also make the room feel wider and lower.
Vertical stacked or vertical offset pattern draws the eye upward, creating the visual impression of height. This is particularly useful in bathrooms with low ceilings or on shower walls where height is a visual priority.
Diagonal/diamond pattern expands a room visually by drawing the eye to the corners rather than straight across, but adds significant waste to the tile quantity required and complexity to the installation — both of which have cost implications.
Large format tiles with minimal grout lines make a small bathroom read as larger by reducing the visual interruptions across the floor or wall surface. A small bathroom tiled in large 60x60cm or 80x40cm tiles with thin grout joints will read as noticeably more spacious than the same bathroom tiled in 10x10cm mosaic.
Order Extra — More Than You Think You Need
This is practical advice that most people receive too late: order more tile than the calculated area requires, and order it from the same batch.
Tile is manufactured in batches called dye lots. Color and surface variation between dye lots — even supposedly identical tiles from the same manufacturer — can be visible enough that mixing dye lots in one installation produces visible inconsistency. A tile that was discontinued or is back-ordered when replacement is needed three years later, or a tile needed from a different dye lot for repairs, produces a patch that doesn’t quite match.
Standard advice is to order ten percent extra over the calculated area. For rooms with complex layouts, diagonal patterns, or many cuts around obstacles, fifteen percent is safer. Keep the remainder after installation for future repairs — properly stored, these tiles remain useful for years.
Trend Tiles and the Longevity Question
Some tile choices are timeless — simple formats in neutral tones that have been in bathrooms for generations and will continue to read as appropriate indefinitely. Some tile choices are very much of a specific moment — the particular geometric pattern, the specific colored grout combination, the distinctive format that appears in every design publication within a short window.
Trend tiles aren’t a mistake. They’re a choice with a specific trade-off: higher visual interest in the short term, higher probability of reading as dated in the medium term. In a bathroom where full retiling is a significant cost, this trade-off is worth evaluating honestly.
The practical question is where the tile is being used. A trend tile on an accent wall — a single surface that could be changed with relatively less disruption — carries the risk differently than a trend tile used on all four walls and the floor of the only bathroom in a home. Statement tiles in limited, defined areas and classic tiles everywhere else is how most experienced designers manage this tension.

Key Takeaways
- Tile samples in showrooms are the worst possible context for making a final decision — evaluate large samples in the actual bathroom under actual lighting
- Grout is not a secondary decision — it occupies up to twenty percent of the visible surface and changes the entire character of the installation
- White grout in a high-use bathroom requires disproportionate maintenance; light gray grout in the same space performs significantly better
- Slip ratings on wet floor tile are a safety specification, not an aesthetic preference — always check DCOF for shower and wet floor areas
- Natural stone requires ongoing sealing in bathrooms; porcelain and glazed ceramic do not
- Installation quality determines the result more than tile quality — spend as much attention selecting the installer as selecting the tile
- Rectified tile allows thin grout joints that produce the seamless look seen in design inspiration; non-rectified tile requires wider joints
- Pattern direction and tile format both affect how a room’s dimensions read — large tiles with thin joints make small bathrooms read larger
- Order at least ten percent extra from the same dye lot and store the remainder for repairs
Frequently Asked Questions
How do I know if a tile has an acceptable slip rating for my shower floor? Ask the retailer for the tile’s DCOF (Dynamic Coefficient of Friction) rating for wet conditions. For wet barefoot areas, a DCOF of 0.42 or higher is the generally accepted minimum. Tiles marketed specifically as floor tiles for wet areas should have this specification available. If a retailer can’t provide it, request the manufacturer’s technical data sheet, which should include it.
Is it worth paying more for rectified tile? If the thin grout line, seamless look is the visual goal, yes — because it’s the only way to achieve that specific result. Non-rectified tiles with the narrow joints used for rectified tiles will look uneven because the dimensional variation requires wider joints to keep the layout consistent. If wider grout lines are acceptable or preferred, the premium for rectification isn’t necessary.
Can I use marble tile in a shower? Yes, with appropriate sealing and realistic maintenance expectations. Marble used in a shower should be sealed with a penetrating stone sealer before installation, and resealed every twelve months under regular use. The grout in a marble shower also benefits from sealing. Without this maintenance, marble in a shower will stain and darken over time. Honed marble shows etching and water marks less dramatically than polished marble in the same application.
What’s the most common tile mistake that’s visible in the finished bathroom? Grout color that wasn’t tested against the actual installed tile before committing. Grout color looks different wet (during application) versus dry (cured), different against the sample tile versus across the full installation, and different under the bathroom’s specific lighting versus showroom lighting. Testing a small area of grout against the actual tile in the actual room before committing to the full installation is standard practice among experienced tilers and a step many DIY and rushed professional installations skip.
How much does layout pattern affect the final tile quantity I need to order? Significantly in some cases. A standard brick offset on a rectangular room adds minimal waste — approximately five to eight percent. A diagonal/diamond pattern adds fifteen to twenty percent waste because of the angled cuts required at every edge. Rooms with many obstacles — toilets, vanities, shower niches, pipes — add waste through the cuts required around each. The more complex the layout and the more obstacles in the room, the more buffer above the basic calculated area is needed.