


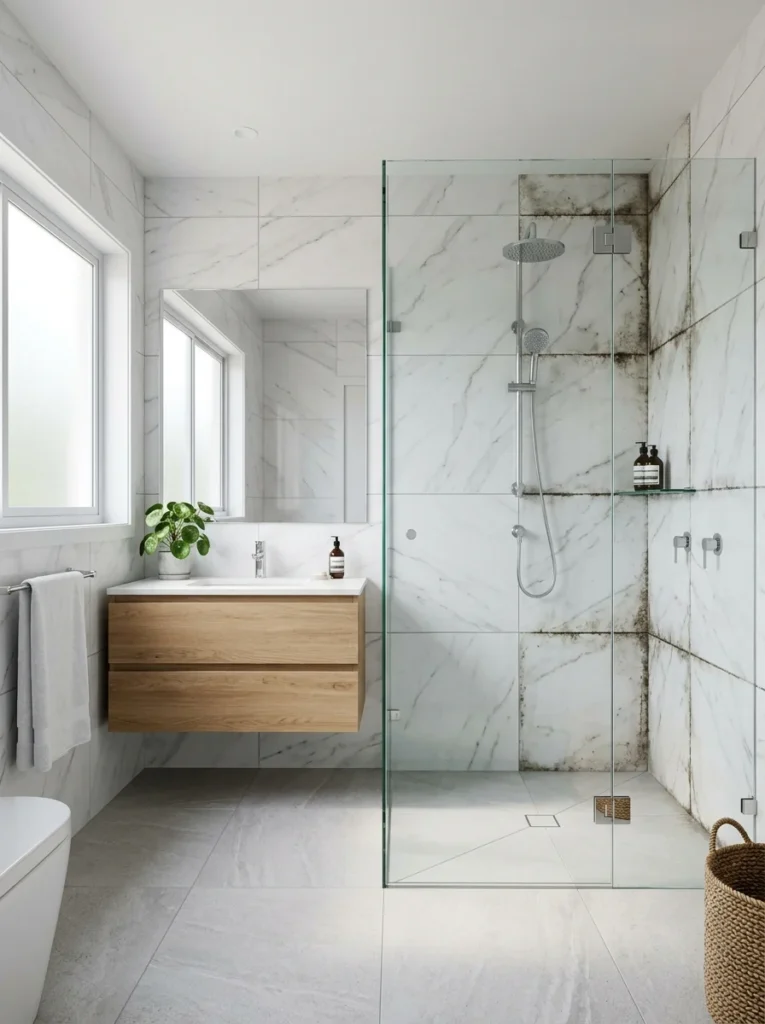
Grout occupies up to 30% of a tiled bathroom surface and is the element most people decide in under five minutes. Here’s everything that decision affects and how to fix it when it goes wrong.Of all the decisions made in a bathroom renovation, grout is the one most people make in under five minutes. It’s also the decision that occupies between fifteen and thirty percent of the total tiled surface area — depending on tile size and joint width — which makes it one of the most visually present elements in the entire room.
Nobody looks at grout. Everybody sees it.
This gap between attention and consequence is why grout is the most reliably overlooked source of a bathroom that reads as tired, dingy, or poorly maintained — and why the same bathroom, after grout cleaning or regrouting alone, can look as though significant renovation work has been done when nothing else has changed. Grout doesn’t announce itself as the problem. It degrades the room quietly, over months, until the bathroom reads as aged in a way that can’t be attributed to any single visible failure.
Understanding what grout actually does, why it fails in the specific ways it does, and what the options are when it fails is the starting point for one of the highest-return interventions available in any tiled bathroom.
What Grout Is and Why It’s Inherently Vulnerable
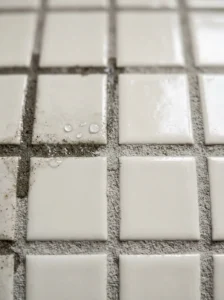
Grout fills the joints between tiles. In most domestic bathrooms, this is cement-based grout — a mixture of cement, sand or aggregate, and water, sometimes with polymer additives to improve flexibility and stain resistance. Once cured, cement-based grout is hard and rigid, and its rigidity is the source of most of its problems.
Bathrooms are environments of constant thermal and humidity cycling. Hot showers, cold surfaces, steam, condensation, and the daily expansion and contraction of the building structure all apply stresses to grout joints over time. Cement-based grout doesn’t flex with these stresses — it cracks, particularly at corners and junctions where two tiled surfaces meet, and at any point where the grout joint isn’t fully supported by the substrate beneath it.
Cement grout is also porous. The surface of an unsealed cement grout joint absorbs liquids — water, soap, body oils, cleaning products — and the particles these liquids carry deposit in the porous surface of the grout, gradually changing its color. This is the mechanism behind grout discoloration, and it operates continuously from the day of installation unless the grout is sealed and the seal is maintained.
The White Grout Problem
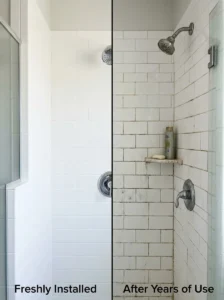
White grout in a shower or high-use bathroom floor is the single most common grout decision and the one most consistently regretted within two to five years of installation.
It’s chosen because it reads as clean, crisp, and professional at installation. It is all of these things at installation, and for a few weeks afterward. In a shower environment — daily soap, body oils, mineral deposits from water, and humidity — white cement grout transitions from clean white to cream to gray to actively discolored, and this transition begins quickly and accelerates over time.
The maintenance required to keep white grout looking white in a shower is disproportionate to the benefit: weekly cleaning with a grout-specific cleaner, diligent sealing, and the acceptance that the grout will gradually yellow regardless of how carefully it’s maintained. Most households don’t maintain this standard, and the white grout becomes a source of “the bathroom looks dirty” in a room that’s actually clean.
The alternative that prevents most of this frustration: a warm gray, greige, or off-white grout in any area with regular moisture exposure. The difference in visual appearance from white grout is slight — particularly when the tile itself is pale — but the difference in how the grout reads after a year of daily use is significant. A warm gray grout that shows a year of use looks like warm gray grout. White grout that shows a year of use looks dirty.
Why Grout Discolors: The Specific Mechanisms
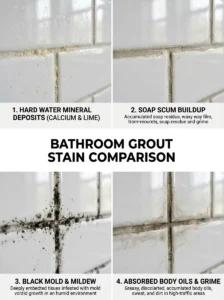
Understanding why grout discolors helps with both prevention and cleaning, because different causes respond to different treatments.
Mineral deposits from hard water — calcium and magnesium left behind as water evaporates — produce a white or pale gray film on grout surfaces, particularly visible in showers and around faucets. This responds to acidic cleaners: white vinegar, citric acid solutions, or commercial descaling products dissolve mineral deposits effectively without damaging the grout.
Soap scum — the residue of body wash, shampoo, and conditioner mixing with hard water minerals — produces a film that feels slightly waxy and responds to alkaline cleaners and scrubbing. Dish soap, dedicated soap scum removers, and baking soda paste with some physical effort remove soap scum from grout effectively.
Mold and mildew produce the black or green spotting that most people recognize as “dirty grout” — this is organic growth, not a stain, and requires a different approach. Bleach-based solutions or oxygen-bleach products kill the mold and lighten the staining it produces. Physical removal with a stiff brush is part of the process, and ventilation improvement is the prevention.
General grime accumulation — the fine particles of everyday use that deposit on any porous surface over time — responds to alkaline cleaning products and requires the physical action of a grout brush. A toothbrush or small stiff-bristled brush used along the grout line removes what a sponge or cloth cannot reach.
Oil and product absorption — body oils and cosmetic products that have penetrated unsealed grout — are the hardest to remove and sometimes cannot be fully removed without regrouting. Prevention through sealing is significantly easier than remediation.
The Grout Cleaning Sequence That Actually Works
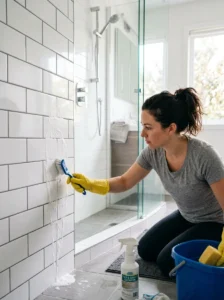
Most people clean grout incorrectly because they apply the wrong cleaner, wait too briefly, or don’t use the right tool. The sequence that produces genuinely clean grout in most situations:
- Wet the grout lines thoroughly with water. Dry grout absorbs cleaning solution and reduces its contact time on the surface. Wet grout keeps the cleaner at the surface longer.
- Apply a grout-specific cleaner, bleach solution (one part bleach to two parts water), or an oxygen-bleach paste. Leave it in contact for ten to fifteen minutes — not thirty seconds. The cleaning action requires dwell time.
- Scrub with a stiff-bristled grout brush along the joint, not across it. A circular scrubbing motion on tile surfaces works; grout lines need to be scrubbed along their length.
- Rinse thoroughly. Cleaning product residue left in grout joints becomes a surface for further deposit accumulation.
- Assess after drying. Grout looks darker and less clean when wet. Wait until the grout is fully dry before evaluating whether the cleaning was successful.
- Repeat if necessary — deeply stained grout often requires two cleaning sessions to produce the full result.
Sealing Grout: What It Does and When
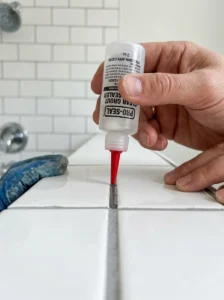
A grout sealer penetrates the surface of cement grout and fills the pores, reducing (but not eliminating) the grout’s ability to absorb liquids and the particles they carry. A sealed grout surface wipes more easily, stains less readily, and maintains its color longer than unsealed grout.
Sealing should happen after installation, after cleaning (so you’re sealing clean grout, not sealing stains in), and at regular intervals depending on the area’s use. A shower floor grout in daily use typically needs resealing annually. A bathroom floor away from the shower might go two to three years. The test for whether sealer is needed: put a drop of water on the grout. If it beads, the seal is intact. If it absorbs immediately, the grout needs sealing.
The application is straightforward: apply the sealer along the grout joints with a small brush or roller applicator, allow it to penetrate for the time specified by the manufacturer, and wipe away excess before it dries on the tile surface. Rushing this step — wiping too early or letting residue dry on the tile — produces a haze on the tile that requires its own removal.
When Cleaning Isn’t Enough: The Regrout Decision
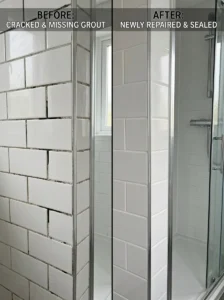
Some grout is too far gone for cleaning to restore. The point at which regrout becomes the right decision:
Cracked or missing grout. Once grout is cracked, the joint is no longer protected from water infiltration. Water reaching the substrate behind tile causes damage that is invisible until it becomes structural. Cracked or missing grout in any wet area — shower, bath surround, floor near the toilet — should be repaired promptly rather than tolerated.
Grout that’s discolored past the level cleaning can reach. Deep oil staining, extensive mold penetration into the grout body rather than just its surface, and organic staining that has absorbed through unsealed grout to a depth cleaning can’t reach — these are conditions where regrouting is the only option for restoration.
Grout that’s shrinking away from tile edges. Over time, some cement grouts shrink and pull away from the tile edges, creating a thin gap that looks dirty and allows water infiltration. This isn’t a cleaning problem — it’s a failure of adhesion that regrouting addresses.
Grout in the wrong color for the bathroom. Regrout is also the correct intervention when the grout color is the problem — when the color chosen at installation reads as wrong with the tile, or when a previous color change left the grout looking unresolved.
Regrouting: What the Process Actually Involves
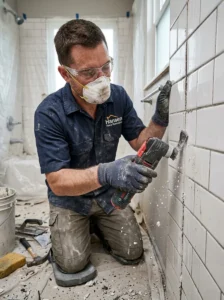
Regrout requires removing the existing grout before applying new grout. This is done with a grout rake — a handheld tool with a carbide blade that cuts along the grout joint — or with an oscillating multi-tool with a grout removal blade, which is faster for larger areas.
The process is physically demanding and produces a significant amount of fine dust. The tile must be carefully masked to avoid damage during grout removal. After removing the old grout to an adequate depth — at least two to three millimeters — the joints are cleaned, new grout is mixed and applied, excess is removed with a grout float, and the tiles are cleaned with a damp sponge before the grout hazes over.
For a shower or a small bathroom floor, this is a full-day project for a competent DIY person, or several hours for a professional. It is significantly less expensive than retiling and produces a result that can look close to a full retile when done well.
Changing Grout Color Without Regrouting
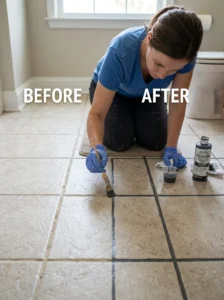
For grout that’s structurally sound — not cracked, not missing — but discolored or the wrong color, a grout stain or colorant provides an alternative to full regrouting.
Grout colorants are pigmented sealers applied over existing grout that penetrate and permanently change the color. They work best on lighter-colored grout being changed to a similar or darker tone, and they require clean, thoroughly dried grout to adhere properly.
The application requires:
- Deep cleaning the existing grout so the colorant is bonding to clean grout rather than sealing over staining
- Masking the tile edges carefully to prevent colorant from drying on the tile surface
- Applying the colorant with a small brush along each joint
- Immediately wiping excess from tile surfaces before it dries
The result is a consistent color change across the entire grout surface that can take a bathroom’s grout from discolored beige to warm gray, or from splotchy white to consistent off-white, without any removal or new grout application. Not suitable for cracked or missing grout, but highly effective for color correction.
Caulk vs Grout: The Distinction That Matters
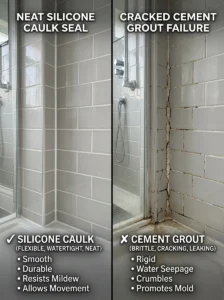
A common source of water damage in bathrooms: the use of grout in joints that should be caulked — the corner where the shower wall meets the shower floor, the joint where the bath meets the wall, and where any two surfaces meeting at an angle are subject to more movement than flat runs of tile.
Grout at these junctions cracks because it can’t flex with the seasonal expansion and contraction of building materials. Once it cracks, water infiltrates and damage begins invisibly behind the tile.
These corners and junctions should be filled with silicone or latex caulk — a flexible sealant that moves with the structure rather than cracking against it. If grout currently fills these joints and it has cracked, the right repair is to remove the cracked grout, clean the joint thoroughly, and apply caulk matched to the grout color rather than regrouting the same joint that will crack again.
Many bathroom leaks diagnosed as plumbing problems are actually caulk failures at the tub or shower surround. Regular inspection of these caulk lines — and recaulking any joint that shows cracking, separation, or discoloration that cleaning doesn’t address — prevents water damage far more cost-effectively than the remediation once water has reached the substrate.

Key Takeaways
- Grout occupies fifteen to thirty percent of a tiled surface depending on tile size and joint width — it’s one of the most visually present elements in any bathroom despite receiving the least attention
- White grout in wet areas requires disproportionate maintenance to maintain its appearance; warm gray or off-white grout shows the same use level far less dramatically
- Grout discolors through specific mechanisms — mineral deposits, soap scum, mold, oil absorption — each responding to different cleaners
- Effective grout cleaning requires proper dwell time (ten to fifteen minutes), the right cleaning agent for the specific type of discoloration, and a stiff-bristled grout brush
- Sealing prevents most staining; the water-drop test confirms whether sealing is currently intact
- Regrout is necessary for cracked or missing grout, deep staining cleaning can’t address, and color correction
- Grout colorant changes an existing grout’s color without removal — effective for sound grout that’s the wrong color or uniformly discolored
- Corners and junctions between tiled surfaces at angles should be caulked, not grouted — caulk flexes; grout cracks
Frequently Asked Questions
How do I know whether my grout needs cleaning, sealing, regrouting, or colorant? Work through a process of elimination. If the grout is cracked or missing, regrout. If it’s structurally sound but discolored: clean thoroughly first and assess. If cleaning produces a significant improvement, seal afterward and maintain with regular cleaning. If cleaning doesn’t produce adequate improvement, grout colorant is the next option if the color is acceptable; regrout if the color itself is the problem. The simplest and cheapest intervention worth exhausting first is always deep cleaning before committing to any other approach.
Can I regrout over existing grout without removing it? Not effectively. New grout applied over old grout without removing the old grout first doesn’t bond properly to the existing surface, tends to be too shallow to be durable, and produces a result that fails quickly. The removal step is the part that makes regrouting produce a lasting result.
What’s the best grout cleaner for black mold staining specifically? Bleach-based products — a solution of one part household bleach to two parts water, or oxygen bleach powder mixed with water to form a paste — are the most effective at killing mold and lifting the staining it produces. Apply with dwell time (ten to fifteen minutes), scrub with a stiff brush, and rinse thoroughly. For persistent mold staining, a second application is often needed. Ventilation improvement is the essential complement to cleaning — cleaning addresses the existing mold; ventilation prevents it from returning.
How long does regrouting a shower typically take, and is it DIY-viable? A small to medium shower surround takes between four and eight hours for a competent DIY person — longer for first-timers unfamiliar with the tools. The grout removal stage is the most time-consuming and physically demanding part. The result is DIY-viable but requires patience, proper tool use (grout rake or oscillating multi-tool), and care not to damage tile during removal. Professionals typically complete the same job in two to four hours. For bathrooms with complex tile layouts, large format tiles (where removal errors are more visible), or very large surface areas, professional regrouting is worth the cost.
Does epoxy grout ever need sealing, and is it worth using instead of cement grout? Epoxy grout is non-porous and doesn’t require sealing — this is its primary practical advantage over cement grout. It’s also significantly more stain resistant, which makes it appropriate for shower floors and other high-use areas where cement grout maintenance is burdensome. The trade-offs: epoxy grout is harder to install (it sets quickly and requires more skill to apply without mistakes), harder to recolor if the color becomes a problem, and costs more than cement grout per installation. In areas where ongoing grout maintenance is a pain point — a heavily used shower floor, a kitchen backsplash near the stove — epoxy grout’s zero-sealing requirement may be worth the higher installation cost and complexity.